Introduction: Why Mastering Backpack Weight Distribution Transforms Your Hiking Experience
The way you pack your backpack can make or break your hiking experience. Proper weight distribution isn’t just about organizing gear—it’s about creating harmony between your body and your pack. When done correctly, it can transform a grueling hike into an enjoyable journey.
Weight distribution refers to how the items in your backpack are arranged based on their weight and your body’s biomechanics. This seemingly simple concept has profound impacts on your outdoor adventures:
- Significantly reduces fatigue and discomfort during long hikes
- Improves balance and stability across varied terrain
- Prevents injuries to your back, shoulders, and knees
- Increases your overall hiking efficiency and enjoyment
This comprehensive guide combines scientific principles of biomechanics with real-world hiking experience to give you practical, proven techniques. Whether you’re planning a day hike or a multi-week adventure, the methods outlined here will help you maximize comfort and minimize strain.
At Summit Carry, our approach to designing leather travel backpacks always begins with understanding how weight distribution affects the hiking experience. The techniques you’ll learn here complement any quality backpack and will transform how you prepare for the trail.
The Science Behind Proper Backpack Weight Distribution
Understanding the science behind proper weight distribution helps you appreciate why certain packing techniques work better than others. Let’s explore the key benefits that result from proper loading:
Enhanced Comfort & Reduced Fatigue
When weight is distributed correctly, pressure points are minimized across your body. Instead of concentrated stress on shoulders or lower back, the weight is evenly spread across your strongest muscle groups. Studies show this reduces perceived exertion by up to 25% on long hikes. The difference between a properly packed and improperly packed bag becomes increasingly apparent with every mile.
Improved Balance & Stability
Your backpack’s center of gravity directly affects your stability. When weight is positioned close to your back and centered properly, you maintain a more natural posture. This proper alignment helps you navigate uneven terrain with greater confidence and less wobbling. Hikers with properly distributed packs report feeling more secure on challenging sections like stream crossings, rocky paths, and steep slopes.
Injury Prevention
Perhaps most importantly, correct weight distribution protects your body from both acute and chronic injuries. Research shows that improper loading increases spinal compression and muscle strain by up to 40%. By contrast, proper technique significantly reduces stress on vulnerable joints like your shoulders, lower back, and knees. The benefits of conditioning leather backpack materials also contribute to long-term comfort by ensuring your pack maintains its structure and support system.
Increased Efficiency & Energy Conservation
Every unnecessary shift of weight in your pack consumes energy. When items are packed strategically, your body works less to compensate for imbalances. This energy conservation translates to approximately 10-15% greater hiking efficiency—meaning you can cover more ground with less fatigue or have more energy for enjoying the scenery and camp activities at the end of the day.
These scientifically-backed benefits aren’t just theory—they translate directly into more enjoyable outdoor experiences and a sustainable approach to hiking that your body will thank you for both during and after your adventures.
Fundamental Principles of Effective Weight Distribution
Before diving into specific packing strategies, it’s important to understand the core principles that guide effective weight distribution. These fundamentals apply regardless of your pack style or trip length:
Center of Gravity Management
Your backpack’s center of gravity should align as closely as possible with your own center of gravity. This means:
– Heaviest items should sit between your shoulder blades and close to your back
– Medium-weight items should surround these heavy items
– Pack weight should feel like it’s an extension of your body, not pulling you backward
This alignment minimizes the leverage effect that occurs when weight pulls away from your center of gravity, reducing strain on your back muscles and improving balance.
The 60-80% Hip Loading Rule
Your legs and hips are designed to carry much more weight than your shoulders. A properly packed and adjusted backpack should transfer:
– 60-80% of total weight to your hips via the hip belt
– Only 20-40% of weight supported by your shoulders
– Almost no weight should pull directly backward on your shoulders
This distribution takes advantage of your body’s strongest muscles while protecting more vulnerable areas.
Symmetrical Loading
Balance between the left and right sides of your pack is crucial for preventing muscle strain and maintaining stability:
– Weight should be evenly distributed between both sides
– Avoid hanging heavy items on only one side of your pack
– Even small imbalances become significant over many miles of hiking
Properly waterproofing leather bags ensures that your pack maintains balance even in wet conditions when some materials might absorb moisture unevenly.
Compression Principles
Eliminating empty spaces and movement within your pack creates stability:
– Use compression straps to secure loads and bring weight closer to your back
– Fill voids with soft items like clothing to prevent shifting
– Think of your pack contents as a single solid unit rather than individual items
Strategic Accessibility
While proper weight distribution is crucial, you also need practical access to essentials:
– Balance the need for ideal weight placement with accessibility requirements
– Items needed during hiking (snacks, rain gear, first aid) should be accessible without disrupting core weight distribution
– Consider how removing items throughout the day will affect overall balance
Body-Pack Integration
Your backpack should feel like a natural extension of your body:
– When properly loaded and adjusted, your pack should move with you, not against you
– Weight should feel centered and stable when you lean forward, backward, or side-to-side
– The pack should not bounce, shift, or swing independently of your movements
Mastering these fundamental principles will serve as your foundation for applying the more specific packing techniques we’ll cover next.
The Zone System: Strategic Packing by Region
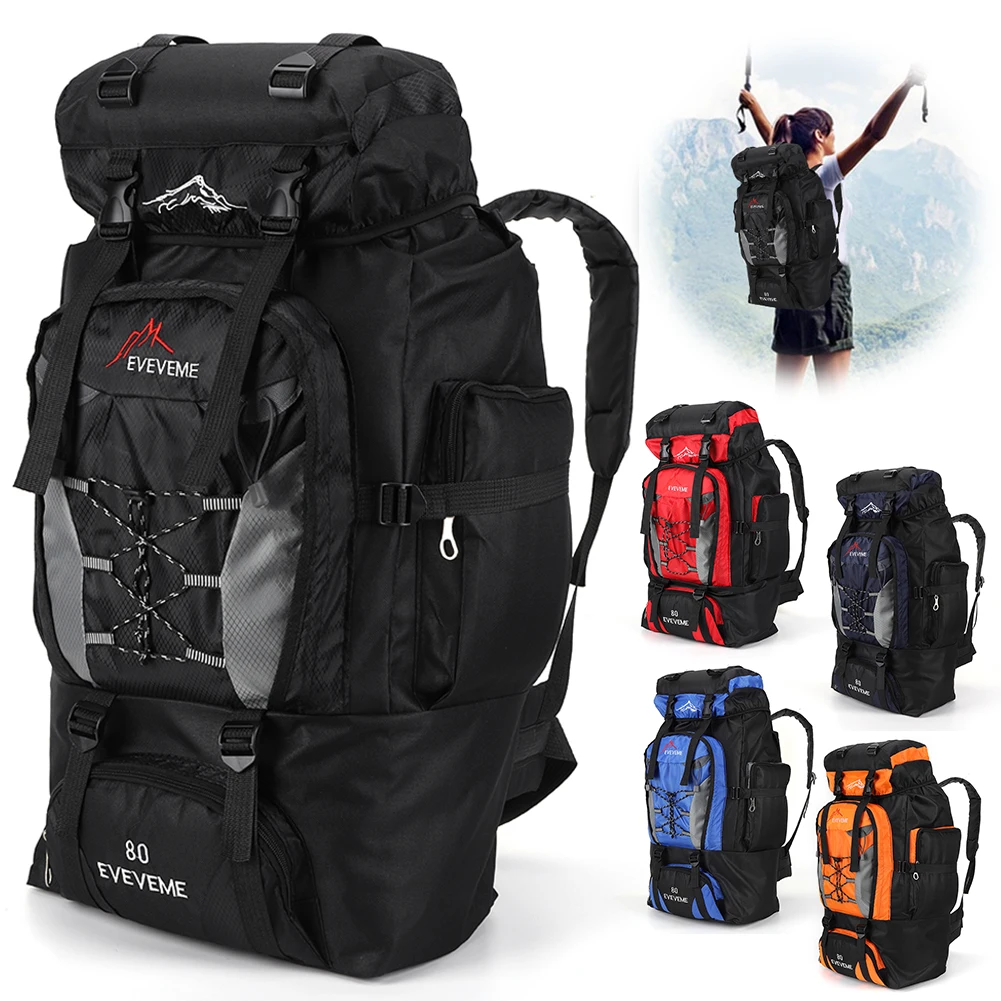
The most effective approach to backpack packing divides your pack into distinct zones, each with specific purposes and ideal contents. This system provides a structured framework for applying the fundamental principles we’ve discussed.
Think of your backpack as having four primary packing zones:
- Bottom Zone: Forms the foundation of your pack
- Core/Middle Zone: Contains the heaviest items closest to your back
- Top Zone: Holds lighter, frequently accessed items
- External Storage: Provides quick access without unpacking
Each zone interacts differently with your body mechanics. The bottom zone affects your lower back and hip positioning. The core zone stabilizes against your back where your strongest muscles can support the weight. The top zone influences your upper back and shoulder strain. External storage impacts your overall balance and stability.
Understanding this zoned approach is particularly important for maintaining the integrity of your gear. Proper DIY leather care for travel backpacks ensures that your pack’s structure remains supportive in all zones throughout your journey.
Professional guides and experienced backpackers universally adopt some version of this zone system because it consistently delivers the best combination of comfort, stability, and practical functionality. In the following sections, we’ll explore exactly what belongs in each zone and how to pack it for optimal performance.
Bottom Zone Packing: Creating a Stable Foundation
The bottom zone of your backpack serves as the foundation for everything above it. This area sits against your lower back and typically accounts for about 25% of your pack’s volume.
Purpose and Function
This zone is ideal for bulky, lightweight items that you won’t need until making camp. The bottom zone helps create a stable base that sits comfortably against your lumbar region while keeping heavy weight out of this area, which could otherwise cause lower back strain.
Optimal Items for Bottom Zone
- Sleeping bag: Typically the bulkiest yet lightest item
- Camp clothes/sleeping clothes: Lightweight and easily compressible
- Sleeping pad (if packed internally): Creates a good cushioned foundation
- Inflatable pillow: Small and light, fits in corners
- Down jacket (if not needed during day): Compressible and lightweight
Packing Techniques
To maximize efficiency in this zone:
- Use a compression sack for your sleeping bag to minimize volume
- Fill small spaces around larger items with soft clothing
- Create an even, level foundation without lumps or protrusions
- Ensure items are tightly packed to prevent shifting
- Consider using a pack liner or waterproof stuff sack in this zone for extra protection
Large leather backpacks benefit particularly from careful bottom zone packing to maintain their shape and prevent sagging, which can affect weight distribution throughout the pack.
Common Mistakes to Avoid
- Placing heavy items in the bottom: This pulls your center of gravity too low and backward
- Loose packing: Creates an unstable foundation that shifts during movement
- Hard items against your lower back: Can cause discomfort and bruising over time
- Difficult access designs: Some packs have separate bottom compartments, but don’t sacrifice weight distribution for convenience
The bottom zone should account for approximately 15-20% of your total pack weight. When properly packed, this zone creates a stable, comfortable base that supports proper posture and prepares for optimal core zone loading.
Core Zone Strategy: Optimizing Your Power Center
The core zone is the most critical area for weight distribution in your backpack. This section sits directly against your back at approximately shoulder blade height, where your strongest muscles can most efficiently support weight.
Purpose and Role
The core zone should carry the heaviest items in your pack positioned:
– As close to your back as possible
– Centered between your shoulder blades
– At or slightly above your back’s midpoint
This placement takes advantage of your body’s natural strength and stability. When weight sits here, it works with—not against—your biomechanics.
Ideal Items for Core Zone
- Food bag: Often your heaviest concentrated item
- Water reservoir or bottles: Heavy but essential (keep filled water closest to your back)
- Cooking system: Pot, stove, and fuel
- Bear canister (if required): Centered and upright
- Tent body and rainfly: Heavy but compressible
- Dense equipment: Tools, repair kits, batteries
Packing Techniques for Stability
- Place heavy items vertically rather than horizontally when possible
- Position the densest items closest to your back
- Arrange items so their weight is centered rather than leaning to one side
- Use clothing to fill gaps between hard items to prevent shifting
- Consider how removing items throughout the day will affect balance
Proper leather maintenance for commuters ensures that your backpack maintains its structural integrity over time, which directly affects how effectively the core zone supports heavy loads.
Weight Distribution Percentages
The core zone typically carries 50-65% of your total pack weight. This concentrates the majority of weight where your body can most efficiently manage it.
Pack Interface Considerations
Premium backpacks feature specific support systems designed for this critical zone:
– Padded back panels that provide comfort while maintaining close contact
– Frame systems that transfer weight from this zone to your hips
– Load lifter straps that optimize the position of core zone weight relative to your back
When properly loaded, your core zone should feel stable and secure, with the weight feeling like an extension of your torso rather than a separate force pulling you backward.
Top Zone Organization: Balancing Access and Stability
The top zone of your backpack serves as both a weight management area and an accessibility hub. This section sits highest on your back and should be reserved for lightweight items you may need throughout your hike.
Purpose and Function
The top zone’s dual purpose requires careful planning:
– Maintains your center of gravity by keeping this zone relatively light
– Provides quick access to essentials without unpacking your core zone
– Creates the final vertical component of your pack’s weight profile
Overloading this zone creates a top-heavy pack that can throw off your balance and strain your shoulders unnecessarily.
Recommended Top Zone Items
- Rain gear: Light yet needed quickly if weather changes
- First aid kit: Quick access for emergencies (unless very heavy)
- Navigation tools: Maps, compass, GPS device
- Extra hiking layers: Light jackets, hats, gloves
- Lunch and snacks for the day: Easy access during breaks
- Headlamp/flashlight: Small but important for visibility
- Toilet kit: Toilet paper, trowel, hand sanitizer
Organization Strategies
To maximize functionality in this zone:
1. Group similar items in color-coded stuff sacks for easy identification
2. Place least frequently used items at the very top or bottom of this zone
3. Position the items you’ll need first on top for access without disturbing other contents
4. Use the “last in, first out” principle when organizing
5. Consider how removing items affects pack balance
Understanding the essential features of waterproof leather backpacks can help you organize this zone with weather protection in mind, as top zone items are sometimes more exposed to the elements.
Weight Considerations
The top zone should contain only about 10-15% of your total pack weight. This lighter loading helps maintain proper posture by preventing the pack from pulling you backward or creating pressure on your shoulders.
Common Missteps
- Placing heavy items too high: Creates instability and shoulder strain
- Overstuffing this zone: Leads to a top-heavy pack that affects balance
- Disorganized packing: Results in removing multiple items to find one thing
- Failing to secure items: Can cause shifting during dynamic movements
When properly packed, your top zone complements the stability of your core zone while providing practical access to items needed during your hike.
External Storage: Maximizing Accessibility Without Compromising Balance
External storage areas offer convenient access to frequently used items without requiring you to open your main pack compartment. However, careful planning is essential to maintain your pack’s balance and stability.
Strategic Use of External Features
Modern backpacks offer various external storage options:
| Storage Type | Ideal Contents | Weight Considerations |
|---|---|---|
| Side Pockets | Water bottles, trekking poles, tent poles | Keep balanced on both sides |
| Hip Belt Pockets | Snacks, phone, lip balm, small camera | Lightweight items only (<1 lb total) |
| Lid/Brain Pocket | Maps, headlamp, first aid, rain cover | Medium priority items (1-2 lbs max) |
| Front/Shove-it Pocket | Rain jacket, wet gear, light layers | Flat items that won’t affect balance |
| Attachment Points | Sleeping pad, ice axe, trekking poles | Secure firmly, balance weight |
Balance Considerations
When using external storage:
- Distribute weight evenly between left and right sides
- Avoid placing more than 10% of your total pack weight in external pockets
- Position items close to the pack body to minimize leverage effects
- Secure all items to prevent swinging or shifting during movement
- Consider how removing externally stored items will affect overall balance
Understanding how leather dries before conditioning can impact your pack’s performance in wet conditions, particularly when storing gear externally where it may be exposed to moisture.
Weather Protection Strategies
External items face greater exposure to the elements:
- Use waterproof stuff sacks for vulnerable items
- Consider how rain, snow, or brush might affect external gear
- Place items that can get wet (like tent poles) externally
- Have a plan to quickly access and deploy rain covers
Common External Storage Mistakes
- Hanging heavy items (like water bottles) too far from your center of gravity
- Attaching items that can snag on branches or rocks
- Creating asymmetrical loading that pulls to one side
- Overloading attachment points beyond their strength limits
- Blocking access to frequently needed items with rarely used ones
When used properly, external storage enhances your hiking experience by providing easy access without compromising the carefully balanced weight distribution of your main pack contents.
Gear-Specific Packing Strategies for Common Hiking Equipment
Different types of gear present unique packing challenges. Here are optimized strategies for common hiking equipment:
Sleeping System
Sleeping Bag:
– Pack at the very bottom of your pack in a compression sack
– Choose the appropriate compression level (don’t over-compress down bags)
– Consider a waterproof compression sack for added protection
Sleeping Pad:
– Closed-cell foam pads: Attach externally (vertical or horizontal)
– Inflatable pads: Pack inside near the bottom or in a side pocket if compact
– Use sleeping pad attachment points if your pack has them
Shelter Components
Strategic Tent Distribution:
– Tent body/rainfly: Pack in core zone (can be split between hikers)
– Poles: Store vertically in side pocket or inside along pack frame
– Stakes and guy lines: Keep with tent body or in a small accessory pocket
– Consider splitting tent components between hiking partners
Food & Water
Food Management:
– Pack food in core zone close to your back
– Organize by meal in separate bags
– Place day snacks in top zone or hip belt pockets
– Adjust as food weight decreases throughout your trip
Water Carrying:
– Bladder: Position against your back in the core zone
– Water bottles: Use side pockets with weight balanced on both sides
– Plan for changing water weight as you drink and refill
Cooking System & Fuel
Safe Placement Considerations:
– Stove and pot: Pack in core zone in a stuff sack
– Fuel: Position upright, away from food, with cap facing away from fabric
– Consider weight distribution as fuel is consumed
– Keep all cooking items together for camp efficiency
Clothing & Layers
Efficient Organization:
– Extra layers: Stuff in spaces between heavier items
– Rain gear: Keep in top zone or external pocket for quick access
– Camp clothes: Pack near bottom with sleeping bag
– Use clothing to fill voids and stabilize other gear
Electronics & Valuables
Protection & Placement:
– Camera: Padding in top zone or core zone depending on size/weight
– Electronics: Waterproof cases in top zone for easy access
– Battery packs: Core zone due to weight
– Protect from impact by surrounding with soft items
High-quality leather travel backpacks offer specialized compartments that provide extra protection for electronic devices while maintaining proper weight distribution.
Specialized Gear
Equipment-Specific Techniques:
– Trekking poles: Attach securely to exterior when not in use
– Climbing gear: Distribute heavy items (protection, rope) in core zone
– Photography equipment: Larger cameras in core zone, smaller in top zone
– Bear canister: Horizontal placement in core zone, close to your back
By applying these gear-specific strategies alongside the zone system, you’ll achieve both optimal weight distribution and practical functionality for all your equipment.
Backpack Design Considerations for Optimal Weight Distribution
The design of your backpack significantly impacts how effectively you can distribute weight. Understanding these design elements helps you select the right pack and maximize its weight-carrying potential.
Internal Frame Packs
Most modern backpacks feature internal frames that offer several advantages for weight distribution:
- Frame Sheets and Stays: Transfer weight directly to your hips
- Back Panel Design: Allows weight to sit closer to your center of gravity
- Load Lifter Straps: Help position the weight at the optimal angle to your back
- Contoured Hip Belts: Distribute weight evenly across hip bones
These packs excel at carrying moderate to heavy loads while maintaining stability on varied terrain.
External Frame Packs
Though less common today, external frame packs offer unique weight distribution benefits:
- Higher Load Position: Places weight slightly higher than internal frames
- Frame Extension: Allows attachment of bulky gear outside the pack body
- Ventilation Space: Creates air gap between pack and back
- Rigid Structure: Maintains shape regardless of packing technique
These designs excel for heavy, bulky loads and provide excellent ventilation in hot weather.
Frameless/Ultralight Packs
For minimalist hikers, frameless packs require special attention to weight distribution:
- Foam Pad Structure: Often use sleeping pad as makeshift frame
- Lower Optimal Carrying Capacity: Best for total weights under 20-25 pounds
- Critical Packing Precision: Weight distribution becomes even more important
- Body-Hugging Design: Keeps weight close but offers less structure
Understanding how oiling affects leather waterproofing impacts the long-term performance and weight characteristics of quality leather packs.
Material and Construction Factors
Pack materials influence both weight distribution and durability:
- Reinforced Bottom Panels: Support heavier items in bottom zone
- Strategic Padding: Protects your body at key contact points
- Compression Systems: Allow adjustment as pack contents change
- Fabric Durability: Affects how the pack maintains its shape under load
When selecting a pack, consider how these design elements align with your typical gear needs and body type to achieve the most comfortable and efficient weight distribution.
The Perfect Fit: Adjusting Your Backpack for Optimal Weight Distribution
Even the most carefully packed backpack won’t perform well if it’s not properly fitted to your body. Follow this adjustment sequence to optimize weight transfer and stability:
1. Preparation: Start Fresh
Begin with all straps loosened and the pack loaded with your typical gear weight. This ensures adjustments match your actual hiking conditions.
2. Hip Belt Positioning and Tightening
- Position the hip belt centered over your iliac crest (the bony part of your hips)
- Tighten the belt firmly so it supports weight but doesn’t pinch or restrict breathing
- The padded sections should wrap around your hip bones, not ride above or below them
- Approximately 80% of the pack weight should transfer to your hips when properly positioned
3. Shoulder Strap Adjustment
- Pull shoulder straps snug but not tight—they should contact your shoulders without creating pressure points
- There should be no gap between the straps and your shoulders
- The straps should wrap over your shoulders and begin to curve around your armpits
- Shoulder straps primarily stabilize the load rather than bear substantial weight
4. Load Lifter Positioning
- Tighten load lifters to create a 10-30 degree angle from your shoulders to the pack
- These straps pull the upper pack toward your body, preventing it from pulling away
- Too tight will create uncomfortable upward pressure, too loose will allow the pack to pull backward
- Proper load lifter adjustment brings weight over your center of gravity
5. Sternum Strap Adjustment
- Position the sternum strap at a comfortable height across your chest (typically 1-2 inches below your collarbones)
- Tighten enough to bring shoulder straps inward slightly without restricting breathing
- This strap prevents shoulder straps from sliding outward under load
- Should feel secure but not constrictive across your chest
6. Compression Strap Usage
- Tighten side compression straps to bring load close to your back
- Adjust top and bottom compression evenly to maintain centered weight
- Re-tighten as contents shift or decrease during your hike
- Use these to eliminate empty spaces that allow weight to shift
Quality leather rucksacks feature adjustment systems that allow for precise fit customization while maintaining their aesthetic appeal.
Signs of Proper Fit
When correctly adjusted:
– You should be able to stand normally without feeling pulled backward
– The pack moves with you, not independently
– Weight feels centered over your hips, not hanging from your shoulders
– You can look up, down, and side-to-side comfortably
– The pack doesn’t bounce significantly when you walk or jump lightly
Proper fit combines with proper packing to create a seamless extension of your body, maximizing comfort and efficiency on the trail. The right backpack size is also crucial for achieving optimal weight distribution.
Troubleshooting Common Weight Distribution Problems
Even experienced hikers occasionally encounter weight distribution issues. Here are solutions to common problems:
Back Pain
Symptoms and Causes:
– Lower back soreness or pain after hiking
– Weight riding too low or too high
– Pack pulling away from your back
Solutions:
– Reposition heavy items closer to your back in the core zone
– Check that hip belt is on iliac crest, not below or above
– Ensure 60-80% of weight transfers to hips, not shoulders
– Tighten load lifters to bring top of pack closer to your body
Shoulder Fatigue
Symptoms and Causes:
– Burning or aching in shoulders and upper back
– Visible pressure marks or redness
– Tingling or numbness in arms
Solutions:
– Loosen shoulder straps slightly—they should contact but not bear weight
– Verify hip belt is carrying most of the load
– Raise heavy items higher in the pack to better align with your back
– Check for proper torso length fit on your backpack
Hip Soreness
Symptoms and Causes:
– Pain or bruising on hip bones
– Hip belt slipping down during hike
– Chafing around waist area
Solutions:
– Ensure hip belt padding covers hip bones completely
– Check that belt is tight enough to not slip but not causing pinching
– Consider additional padding for pressure points
– Verify pack size matches your torso length
Pack Instability
Symptoms and Causes:
– Pack wobbles or shifts while hiking
– Contents seem to move inside the pack
– Pack pulls you off-balance on uneven terrain
Solutions:
– Use compression straps to eliminate empty spaces
– Redistribute weight more symmetrically left-to-right
– Fill voids between items with clothing or soft gear
– Check that heaviest items are centered and close to your back
Terrain-Specific Challenges
Steep Ascents:
– Tighten shoulder straps slightly to bring weight forward
– Loosen hip belt slightly to allow greater hip flexibility
– Shift some weight higher in the pack
Steep Descents:
– Loosen shoulder straps slightly to prevent pack from pulling backward
– Tighten hip belt firmly to keep weight on hips
– Ensure top of pack isn’t overloaded
Side-hills:
– Tighten compression straps on the downhill side
– Adjust shoulder strap on uphill side to level the load
– Redistribute some weight to the uphill side if possible
Understanding how waterproofing leather bags affects their performance in wet conditions can help prevent additional problems when hiking in rain or crossing streams.
By identifying the specific symptoms you’re experiencing, you can make targeted adjustments to resolve most weight distribution issues without completely repacking your backpack.
Advanced Weight Distribution Techniques for Experienced Hikers
As you gain experience, you can refine your packing strategy with these advanced techniques:
Adaptive Distribution for Changing Terrain
Experienced hikers adjust their pack weight throughout the day:
– Slightly loosen hip belt for steep uphill sections
– Tighten all straps for technical terrain requiring balance
– Shift some weight higher in the pack for uphill climbs
– Move some weight lower for steep downhills and better stability
– Readjust compression system as water and food weight decreases
Ultra-efficient Organization Systems
Develop a modular packing system:
– Color-coded stuff sacks for different gear categories
– Standardized packing order that becomes muscle memory
– Compartmentalization that allows removing one item without disturbing others
– Systems for tracking smaller items (repair kits, electronics, etc.)
– Quick-access configurations for weather-dependent gear
Weather-responsive Adjustments
Adapt your packing strategy based on conditions:
– Pre-position rain gear for quick access when storms threaten
– Adjust external attachment use based on precipitation forecast
– Create dry-weather and wet-weather configurations
– Develop systems for keeping critical gear dry in prolonged rain
– Plan for weight changes as clothing gets wet or dries
Long-distance Strategies
Thru-hikers and long-distance backpackers develop specialized approaches:
– Progressive weight shifting as consumables are used
– “Food bag drop” techniques to maintain balance as supplies diminish
– Strategic placement of “sometimes carried” items like extra water
– Variable compression systems that adapt as pack volume decreases
– Body-adaptation considerations as fitness improves during long journeys
Men’s leather travel backpacks often incorporate versatile features that support these advanced techniques while maintaining comfort and style for both trail and travel use.
Technical Terrain Specialization
For challenging conditions, consider:
– Lowering overall pack height for better balance on exposed ridges
– Creating a more compact profile for dense brush or forest
– Securing all external items when scrambling is required
– Developing quick-adjustment techniques for transitioning between terrain types
– Specialized attachment systems for technical gear like ice axes or climbing rope
These advanced techniques come with experience and allow you to adapt to virtually any condition while maintaining optimal comfort and efficiency.
14 Inch Leather Laptop Backpack, Brown Leather Backpack, Men's Leather Backpack, Vintage Leather Backpack
Price range: $177.28 through $199.12 Select options This product has multiple variants. The options may be chosen on the product pageCarry On Leather Backpack, Roll Top Leather Backpack
Price range: $77.76 through $96.48 Select options This product has multiple variants. The options may be chosen on the product page17 Inch Leather Laptop Backpack, Men's Leather Travel Backpack, Men's Leather Work Backpack
Price range: $106.28 through $143.88 Select options This product has multiple variants. The options may be chosen on the product page- Price range: $80.72 through $108.04 Select options This product has multiple variants. The options may be chosen on the product page
15 Inch Leather Laptop Backpack, Carry On Leather Backpack
Price range: $136.84 through $139.88 Select options This product has multiple variants. The options may be chosen on the product pageLarge Leather Backpack, Women's Leather Backpack
Price range: $97.12 through $97.96 Select options This product has multiple variants. The options may be chosen on the product page
Are Different Weight Distribution Techniques Needed for Everyday Backpacks?
While we’ve focused primarily on hiking applications, the principles of weight distribution apply equally to everyday backpacks used for work, school, and travel. However, some adaptations are worth considering:
Adapting Outdoor Principles for Daily Use
Many core concepts remain the same:
– Heavy items should still be placed close to your back
– Weight should be centered and balanced left-to-right
– The pack should fit properly with weight primarily on your hips (if it has a hip belt)
– Compression helps stabilize loads in any context
The main difference is typically load weight and duration of carrying. Daily backpacks usually carry lighter loads for shorter periods, allowing some flexibility in strict distribution rules.
Laptop and Electronics Placement
For everyday backpacks, electronic protection often takes priority:
– Laptops should be positioned in dedicated sleeves closest to your back
– This placement protects the device and places its weight optimally
– Power banks and heavier accessories should be in middle compartments
– Cords and smaller accessories work well in outer organizational pockets
Quality backpacks designed for daily use often incorporate padded laptop compartments that simultaneously protect electronics and optimize weight distribution.
Urban vs. Wilderness Considerations
Daily backpack use differs from wilderness applications:
– More frequent accessing of contents requires more organizational pockets
– Quick-access becomes relatively more important than perfect weight distribution
– Weather protection might focus more on sudden showers than prolonged exposure
– Specialized pockets for transit cards, phones, and small electronics become important
Summit Carry’s premium backpacks incorporate features that excel in both outdoor and urban environments, with leather waterproofing products providing protection regardless of your environment.
By applying the fundamental principles of weight distribution to your everyday carry, you can significantly improve comfort and reduce strain during commutes, travel, and daily activities.
Can Proper Weight Distribution Techniques Reduce Back Pain from Backpacking?
Proper weight distribution techniques can dramatically reduce or eliminate back pain associated with carrying a backpack. Here’s how these methods directly impact back health:
Biomechanical Impact on Spine Health
When weight is distributed correctly:
– Vertebral compression is minimized through proper vertical alignment
– Disc pressure is reduced by transferring weight to the hips
– Muscle strain decreases as major muscle groups share the load appropriately
– Natural spine curvature is maintained rather than forced into unnatural positions
Research from sports medicine and physical therapy consistently shows that proper load positioning significantly reduces spinal stress compared to improper carrying techniques.
Posture Considerations
Weight distribution directly affects posture while hiking:
– Properly balanced packs allow you to maintain an upright, natural stance
– Improperly loaded packs force compensatory posture changes
– Good posture while carrying loads reduces both immediate discomfort and long-term issues
– Core engagement is easier with properly distributed weight
High-quality men’s leather backpacks are designed with ergonomic considerations that support proper posture and complement good packing techniques.
Prevention-Focused Approach
For those with existing back concerns:
– Focus on lightweight gear choices to reduce overall load
– Be extra diligent about keeping weight close to your back
– Consider a pack with more structured support systems
– Pay special attention to hip belt fit and function
– Build up carrying capacity gradually through training
While proper weight distribution isn’t a cure for existing medical conditions, it can significantly reduce the impact of carrying loads on your back and help prevent new injuries from developing.
What is the Ideal Pack Weight Percentage for Different Body Types?
The appropriate pack weight varies based on individual factors including fitness level, experience, body composition, and trip duration. While there’s no one-size-fits-all answer, these guidelines provide a solid starting point:
| Hiker Category | Recommended Max Pack Weight (% of Body Weight) | Additional Considerations |
|---|---|---|
| Beginners | 15-20% | Start lower and gradually increase with experience |
| Intermediate | 20-25% | Focus on technique before increasing weight |
| Experienced | 25-30% | Should be comfortable with proper distribution |
| Ultralight Hikers | 10-15% | Specialized lightweight gear required |
| Youth/Smaller Frames | 15-20% | Pay special attention to proper fit |
| Weekend Trips | 15-25% | Depends on conditions and comfort needs |
| Extended Trips | 20-30% | Food and water make up larger percentage |
Individual Adaptation Factors
Several personal factors should influence your target weight:
- Fitness Level: Overall strength and cardio fitness affect carrying capacity
- Previous Injuries: Prior back, knee, or hip issues may necessitate lighter loads
- Trip Conditions: Terrain difficulty and weather may require adjusting downward
- Age: Recovery capacity changes with age, often requiring load adjustment
- Experience: Technical skill in pack adjustment improves carrying efficiency
Warning Signs of Excessive Weight
Pay attention to these indicators that your pack may be too heavy:
– Inability to put on or take off your pack without assistance
– Significant forward lean required to balance
– Inability to walk comfortably for 15 minutes without rest
– Pain (not just muscle fatigue) in back, hips, or knees
– Numbness or tingling in extremities
– Excessive breathing rate on moderate terrain
The most sustainable approach is to start conservative and gradually increase as your experience and comfort level grow, always prioritizing proper weight distribution techniques regardless of the total load.

