
Understanding the Importance of Leather Care
Leather is a remarkable natural material, composed of tightly woven protein fibers and collagen structures that create its distinctive durability and flexibility. Unlike synthetic materials, leather is essentially preserved animal skin, which means it retains many of its natural properties—including the need for ongoing maintenance.
Without proper care, leather gradually loses the natural oils that keep it supple. Environmental factors like sunlight, heat, moisture, and everyday use accelerate this process. Over time, neglected leather becomes dry, stiff, and eventually develops unsightly cracks that can compromise both its appearance and structural integrity.
This is where the twin practices of conditioning and waterproofing become essential. These complementary processes work together to:
- Replenish essential oils and moisture that naturally deplete over time
- Create a protective barrier against water, stains, and environmental damage
- Maintain the leather’s natural flexibility and prevent cracking
- Preserve the rich color and develop a beautiful patina
- Extend the lifespan of your leather goods significantly
Research shows that regularly conditioned and protected leather items typically last 2-3 times longer than neglected pieces. This care transforms your premium leather goods from mere purchases into lasting investments that improve with age.
The comprehensive information about leather care basics demonstrates that proper maintenance isn’t merely cosmetic—it’s about preserving the functional properties that make leather so desirable in the first place.
The Natural Properties of Premium Leather
Not all leather is created equal, and understanding the specific properties of your leather items helps determine the right care approach. Premium leather goods typically use full-grain or top-grain leather—the highest quality options available.
Full-grain leather includes the entire top layer of the hide with its natural grain pattern intact. This leather retains all the natural markings and character, developing a beautiful patina over time. Because it hasn’t been sanded or buffed, it contains the densest fiber structure, making it exceptionally durable but also requiring proper conditioning to maintain flexibility.
Top-grain leather has been lightly sanded to remove minor imperfections, creating a more uniform appearance while still retaining excellent durability. The detailed comparison of leather types reveals how these differences affect both appearance and maintenance needs.
One of leather’s most remarkable natural properties is its breathability—it allows air to circulate while still providing protection. This quality makes leather comfortable in various temperatures but also means it can absorb moisture from the environment. High-quality full-grain leather backpacks showcase these natural characteristics beautifully.
The tanning method also significantly impacts how leather responds to conditioning and waterproofing:
- Vegetable-tanned leather uses natural plant materials and develops a rich patina but may be more susceptible to water damage
- Chrome-tanned leather incorporates minerals for increased water resistance but may require different conditioning products
Understanding these inherent qualities helps explain why premium leather deserves—and requires—thoughtful care to maintain its distinctive properties.
How Regular Maintenance Preserves Leather Quality
Establishing a consistent leather care routine delivers numerous tangible benefits:
- Moisture Balance Restoration: Conditioning replenishes essential oils that prevent leather from drying out and becoming brittle
- Structural Integrity: Regular care prevents the microscopic cracks that eventually lead to visible damage
- Enhanced Flexibility: Well-conditioned leather maintains its suppleness, preventing stiffness that affects both comfort and appearance
- Improved Water Resistance: Even before specific waterproofing, conditioned leather naturally repels moisture better than dry leather
- Character Development: Proper care encourages the development of a rich patina—the desirable color deepening and subtle sheen that makes each piece unique
- Environmental Protection: Conditioning creates a barrier against UV damage, pollution, and other environmental factors
- Extended Lifespan: Perhaps most importantly, regular maintenance dramatically extends your leather product’s usable life
The ultimate guide conditioning leather backpack provides deeper insights into these preservation techniques. By understanding and implementing these practices, you transform leather care from a chore into an investment in your item’s longevity and beauty.
Essential Tools for Complete Leather Care
Building an effective leather care kit requires understanding the specific tools needed for each stage of maintenance. Having the right supplies ensures you can properly clean, condition, and waterproof your leather goods without causing damage.
For Cleaning:
- Soft microfiber cloths (lint-free and non-abrasive)
- Horse-hair brushes in various sizes
- Leather-specific cleaner or mild saddle soap
- Small sponges for applying cleaner
- Cotton swabs for detailed areas
- Distilled water for diluting products or dampening cloths
For Conditioning:
- Applicator pads or sponges
- Soft cloths for buffing
- Small containers for dispensing product
- Gloves (optional, but helpful with darker conditioners)
- Small brushes for seams and detailed areas
- Timer (to track absorption periods)
For Waterproofing:
- Spray bottle applicators for liquid repellents
- Clean, lint-free cloths for wax application
- Small spatulas for cream or paste products
- Buffing cloths (separate from conditioning cloths)
- Newspaper or drop cloths to protect work surfaces
Proper tool maintenance is equally important—washing applicator cloths separately from regular laundry, storing brushes bristle-up to maintain their shape, and keeping all products in a cool, dry place away from direct sunlight. The overview of quality leather care products provides additional guidance on building your toolkit.
Cleaning Supplies: The Foundation of Good Leather Care
Before conditioning or waterproofing, thorough cleaning is essential. The right cleaning supplies remove dirt and oils that could prevent conditioning products from properly absorbing into the leather.
Microfiber Cloths: These ultra-soft cloths trap dust particles rather than pushing them into leather grain. Unlike regular cotton cloths, they won’t leave lint behind or scratch delicate surfaces.
Leather-Specific Cleaners: Formulated with a balanced pH, these cleaners remove surface dirt without stripping natural oils. Avoid household cleaners containing alcohol, ammonia, or bleach, as these can permanently damage leather.
Soft Bristle Brushes: Horse-hair brushes work particularly well for textured leather, as they can reach into the grain without causing abrasion. Different sizes help clean various surfaces and hard-to-reach areas.
pH-Balanced Soaps: For heavily soiled items, a mild saddle soap creates a gentle lather that lifts dirt without harsh detergents. Look for glycerin-based formulas.
Emergency Cleaning Wipes: For on-the-go maintenance, leather-specific wipes handle quick cleanups without leaving residue that can attract more dirt.
Household products like dish soap, vinegar, or all-purpose cleaners might seem convenient alternatives, but they can strip essential oils or alter the leather’s pH balance, causing long-term damage that outweighs any short-term cleaning benefit.
Conditioning Products for Different Leather Types
Selecting the right conditioner for your specific leather type is crucial for maintaining its unique qualities. Different formulations offer varying benefits depending on your leather’s characteristics and intended use.
| Conditioner Type | Best For | Absorption | Darkening Effect | Waterproofing |
|---|---|---|---|---|
| Cream Conditioners | Finished leathers | Moderate | Minimal | Low |
| Oil-Based Conditioners | Dry, matte leathers | Deep | Moderate to High | Moderate |
| Wax-Based Balms | Work/outdoor leather | Surface layer | Slight | High |
| Hybrid Formulas | Everyday leather goods | Balanced | Low to Moderate | Moderate |
Cream conditioners provide lighter treatment and are excellent for maintaining regularly cared-for items. They typically contain emulsified oils that nourish without dramatically changing the leather’s appearance.
Oil-based conditioners like neatsfoot or mink oil penetrate deeply, making them ideal for rejuvenating severely dried leather. However, these oils can significantly darken lighter leathers—something to consider before application. The relationship between oiling and waterproofing leather is complex, as oils provide some water resistance but not complete protection.
Natural conditioners derived from plant and animal sources (like lanolin, beeswax, or jojoba oil) offer excellent nourishment with minimal chemicals. Synthetic options often include silicones or polymers that create consistent results but may build up over time.
Always match your conditioner to your leather’s finish—suede and nubuck require specialized products, while finished leather benefits from traditional conditioners. Testing any new product on an inconspicuous area first prevents unwelcome surprises.
Waterproofing Solutions: Types and Applications
Waterproofing creates an additional protective barrier that helps leather resist moisture without compromising its breathability. Understanding the strengths and limitations of different waterproofing methods helps determine which is right for your leather goods.
Spray Protectors
– Advantages: Easy application, minimal darkening, quick drying
– Limitations: Less durable protection, requires frequent reapplication
– Best for: Everyday items, suede/nubuck, maintaining original appearance
– Application: Even, light coats from 6-8 inches away
Wax-Based Waterproofers
– Advantages: Superior long-lasting protection, conditions while protecting
– Limitations: More time-consuming application, may darken leather
– Best for: Work boots, outdoor equipment, leather travel backpacks
– Application: Thin layers worked into leather with gentle heat
Combination Products
– Advantages: Streamlined process, balanced protection
– Limitations: May not excel at either conditioning or waterproofing
– Best for: Low-maintenance routines, occasional use items
– Application: Varies by formulation, follow product instructions
It’s important to understand that leather can be made highly water-resistant but never truly waterproof like synthetic materials. Quality leather will resist brief exposure to water but isn’t designed for submersion or prolonged exposure to heavy rain without specialized treatment.
The comprehensive waterproofing methods emphasize that proper application technique significantly impacts effectiveness. Multiple light applications typically provide better protection than a single heavy coat, which can clog leather’s natural pores and reduce breathability.
The Complete Leather Cleaning Process
Proper cleaning serves as the essential foundation for effective leather care. Removing surface contaminants allows conditioning and waterproofing products to penetrate properly, ensuring maximum benefit and protection.
Step 1: Prepare and Test
Before beginning, test any cleaning products on an inconspicuous area to ensure they won’t damage the finish or color. Gather all necessary supplies and work in a well-lit, clean environment.
Step 2: Remove Surface Debris
Begin with a dry cleaning process. Gently brush the entire surface with a soft brush to remove loose dirt and dust, paying special attention to seams and crevices where particles collect.
Step 3: Spot Cleaning
Address specific stains before general cleaning:
– Water spots: Dampen a cloth with distilled water and gently blot
– Oil stains: Use a small amount of cornstarch to absorb excess oil
– Ink: Consult a professional, as most home remedies can spread the stain
Step 4: General Surface Cleaning
Dampen (not wet) a clean cloth with leather cleaner or mild soap solution. Work in small sections using gentle circular motions, avoiding excessive moisture. Immediately wipe with a dry cloth to prevent saturation.
Step 5: Proper Drying
Allow leather to dry naturally away from direct heat sources like radiators, hair dryers, or sunlight. Proper drying before conditioning is crucial, as trapped moisture can interfere with conditioning product absorption.
For heavily soiled items, you may need to repeat the cleaning process, allowing the leather to dry completely between treatments. Always work gently—aggressive scrubbing can damage the leather’s surface structure or remove color.
Preparing Your Workspace for Leather Care
Creating an optimal environment for leather care improves results and prevents accidental damage:
- Choose a clean, flat surface with good lighting—natural daylight is ideal for accurately assessing leather condition and color
- Place a protective covering (like a clean towel or plastic sheet) over your work surface to prevent staining
- Arrange all products and tools within easy reach before beginning
- Ensure adequate ventilation, especially when using spray products or cleaners with strong scents
- Have a clean, dry area prepared where items can air-dry undisturbed
- Keep water, food, and potentially staining liquids away from your workspace
- Have clean hands or wear nitrile gloves to prevent transferring oils and dirt
- Keep a supply of clean cloths available for each step of the process
Taking these preparatory steps ensures you have everything needed to complete the entire care process without interruption, reducing the risk of uneven application or missed steps.
Effective Techniques for Removing Surface Dirt
Different leather textures and finishes require specific cleaning approaches to effectively remove dirt without causing damage:
For smooth, finished leather:
1. Start with a soft, dry cloth to gently remove loose surface dust
2. Use soft, circular motions working from the center outward
3. For more stubborn dirt, slightly dampen a cloth with distilled water
4. Apply minimal pressure—let the cleaning solution do the work
5. Dry immediately with a separate clean cloth
For textured leather:
1. Use a soft-bristled brush in the direction of the texture pattern
2. Brush gently in short strokes to dislodge dirt from recessed areas
3. Follow with a slightly damp cloth if needed
4. Pay extra attention to edges and seams where dirt accumulates
5. Use a cotton swab for tight spaces and stitching lines
When cleaning any leather, avoid oversaturation—excess moisture can penetrate leather and cause damage that’s difficult to reverse. Always wipe away cleaning solution completely before moving to conditioning.
Leather Conditioning Mastery
Conditioning is perhaps the most important aspect of leather care, as it replaces essential oils that evaporate over time. These natural oils keep leather fibers lubricated and flexible, preventing the microscopic cracks that eventually lead to visible damage.
The science behind conditioning is straightforward: as leather ages and is exposed to environmental factors, it gradually loses its natural oils. Conditioning products penetrate between the fibers, coating them with new lubricants that restore flexibility and provide protection.
The Complete Conditioning Process:
Select the appropriate conditioner based on your specific leather type. Full-grain leather typically benefits from more nourishing products, while finished leathers may need lighter formulations.
Apply sparingly using the “less is more” principle. Excess conditioner can’t be absorbed and may leave a sticky residue or cause darkening. Start with a small amount and add more only if needed.
Use proper application technique by working the conditioner into the leather with small, circular motions. Apply even pressure and ensure complete coverage, including edges and seams where drying often begins.
Allow proper absorption time based on the product’s instructions. This typically ranges from 15 minutes for light conditioners to several hours for heavier oils. The specific conditioning needs for daily use items may differ from occasional-use pieces.
Buff thoroughly with a clean, dry cloth to remove any excess product and restore the desired finish. This final step enhances the leather’s natural luster without leaving a greasy appearance.
Conditioning frequency depends on usage patterns and environmental conditions. Items exposed to harsh elements or frequent handling may need monthly attention, while stored items might need conditioning just 2-3 times yearly. Premium leather items particularly benefit from regular conditioning to maintain their exceptional quality.
Choosing the Right Conditioner for Your Leather Type
Selecting the appropriate conditioner significantly impacts your leather’s appearance, texture, and longevity:
For Full-Grain Leather:
Choose rich conditioners that penetrate deeply to nourish throughout the hide’s thickness. These leathers can handle more substantial products like beeswax-based conditioners or neatsfoot oil compounds.
For Top-Grain Leather:
Use moderate conditioners that maintain the partially finished surface while providing adequate moisture. Cream-based products typically work well for this leather type.
For Finished Leather:
Select light conditioners that won’t interfere with the protective topcoat. Look for products specifically labeled for finished or coated leather.
Climate Considerations:
– Dry climates require more frequent conditioning with richer products
– Humid environments benefit from lighter conditioning but more frequent cleaning
– Seasonal transitions often necessitate conditioning to prepare for changing conditions
The desired finish also impacts your choice—matte finishes benefit from oil-free conditioners, while products containing natural oils often enhance luster for a richer appearance.
Always consider how the conditioner might affect color. Some products, particularly oil-based options, can darken leather significantly. This effect is often permanent and more pronounced on lighter colors.
Proper Conditioning Application Techniques
Masterful conditioning comes down to technique as much as product selection:
Surface Preparation
Ensure leather is completely clean and dry before conditioning. Any trapped moisture or dirt will interfere with absorption and potentially cause spotting.Product Testing
Apply a small amount of conditioner to an inconspicuous area and wait 24 hours to observe any color changes or adverse reactions.Tool Selection
Choose the right applicator—soft cloths work well for smooth surfaces, while sponge applicators help with textured leather. For best results, dedicated applicators prevent cross-contamination.Application Method
Apply using small, overlapping circular motions, working systematically across the surface. This technique ensures even distribution and helps work the product into the leather’s grain.Absorption Management
Allow the leather to absorb the conditioner for the recommended time. For most products, you’ll notice the conditioner gradually disappearing as it penetrates the leather.Buffing Technique
After absorption, buff with a clean, dry cloth using light pressure and circular motions. This removes excess product and enhances the finish. Vintage leather backpacks particularly benefit from proper buffing to enhance their characteristic patina.
Common mistakes include:
– Over-applying conditioner (creating a sticky residue)
– Rushing the absorption period (preventing deep penetration)
– Uneven application (resulting in splotchy appearance)
– Using incompatible products (causing finish damage)
For precision work, applying conditioner with fingertips provides better control and feedback than cloths, particularly around hardware or detailed areas. However, this method requires thorough hand washing immediately afterward to prevent oil transfer to other surfaces.
Waterproofing Your Leather: Methods and Best Practices
Waterproofing adds an essential protective layer that helps leather resist moisture damage without compromising its natural breathability. Understanding that leather is naturally somewhat water-resistant but not waterproof helps set realistic expectations for what these treatments can achieve.
Determining Waterproofing Needs
Not all leather items need the same level of waterproofing:
– Daily-use items exposed to unpredictable weather benefit from regular protection
– Decorative pieces kept indoors may need minimal waterproofing
– Work boots or outdoor gear require maximum protection
– Items with significant existing patina may change appearance with waterproofing
Selecting Appropriate Products
Choose waterproofing products based on:
– Leather type and finish
– Desired level of protection
– Acceptable appearance changes
– Environmental exposure level
– Frequency of reapplication you can maintain
Application Process
Ensure Clean, Conditioned Surface
Complete cleaning and conditioning before waterproofing, allowing full drying between steps.Apply According to Product Type
– Spray products: Apply in light, even coats from the recommended distance
– Wax products: Work into leather using body heat to soften the wax
– Cream products: Apply thin layers with a cloth using circular motionsFocus on Vulnerable Areas
Pay special attention to seams, stress points, and areas likely to encounter water directly.Allow Proper Setting Time
Most waterproofing products require 24-48 hours to fully cure and create an effective barrier. Rushing this process compromises protection.Test Effectiveness
After curing, test by sprinkling a few drops of water on the surface—they should bead up rather than soak in. Essential features of waterproof leather backpacks often include multiple layers of protection.
Waterproofing typically lasts 3-6 months depending on exposure and wear. Items used daily in challenging conditions may need reapplication every season, while stored items may maintain protection much longer. The comprehensive waterproofing guide provides detailed reapplication timelines.
Spray Waterproofing: Techniques for Optimal Coverage
Spray waterproofing products offer convenience and even coverage when applied correctly:
Proper Distance: Hold the spray can 6-8 inches from the leather surface—too close causes oversaturation, too far results in uneven coverage.
Sweeping Motion: Use continuous, overlapping passes to ensure complete coverage without concentrating too much product in any area.
Multiple Light Coats: Apply 2-3 thin coats rather than one heavy application. This prevents dripping and allows each layer to bond properly.
Drying Between Coats: Allow 15-20 minutes between applications for the solvent to evaporate and the protective agents to begin setting.
Ventilation Considerations: Always use spray products in well-ventilated areas, ideally outdoors or near an open window.
Complete Curing: While the surface will feel dry within hours, full water-resistant properties develop over 24-48 hours as the polymers fully cure.
For curved surfaces like shoes or handbags, maintain consistent distance while following the contours. Pay special attention to edges and seams where water typically penetrates first.
Wax-Based Waterproofing for Maximum Protection
Wax-based waterproofing provides superior, longer-lasting protection but requires more careful application:
Preparation: Ensure the wax is at room temperature for easier application. Some products benefit from slight warming between your hands.
Application Technique: Using clean fingers or a soft cloth, apply a thin layer using small circular motions. The friction and body heat help the wax penetrate the leather’s surface.
Focus on Critical Areas: Work additional product into stress points, seams, and areas most likely to encounter water.
Heat Application: Some waxes benefit from gentle heat after application—use a hair dryer on low setting held 8-10 inches away to help the wax melt slightly and penetrate deeper.
Removal of Excess: After absorption (typically 5-10 minutes), buff the surface with a clean cloth to remove any unabsorbed wax.
Extended Curing: Allow 24-48 hours for the wax to fully set before exposure to moisture.
Wax-based waterproofing typically provides 6-12 months of protection compared to 3-6 months for spray products, making it ideal for items that see heavy use or challenging conditions.
Specialized Care for Different Leather Types
Different leather varieties require tailored care approaches to maintain their unique characteristics and extend their lifespan.
Full-Grain Leather
This highest quality leather retains the hide’s natural grain pattern and develops a beautiful patina over time. Care focus:
– Regular, moderate conditioning to maintain natural flexibility
– Gentle cleaning to preserve the natural surface texture
– Acceptance of character marks as part of the leather’s unique appeal
– Attention to maintaining even color development
Top-Grain Leather
With its outer layer sanded and refinished, top-grain leather balances durability with consistent appearance. Care focus:
– Protection of the finished surface from scratches
– Light, regular conditioning to maintain the applied finish
– Prompt attention to scuffs to prevent permanent marking
– Protective treatments to maintain the uniform appearance
Suede and Nubuck
These velvety-textured leathers require entirely different care approaches:
– Use only products specifically formulated for suede/nubuck
– Focus on stain prevention rather than conditioning
– Regular brushing to maintain nap and texture
– Specialized waterproofing sprays that won’t mat down the surface
Patent Leather
With its high-gloss, sealed finish, patent leather needs minimal conditioning but careful cleaning:
– Wipe with a damp cloth and dry immediately
– Use patent-specific cleaners for stubborn marks
– Avoid all traditional leather conditioners
– Apply patent leather refresher products to maintain shine
Exotic Leathers
Materials like alligator, ostrich, or snake leather have unique scale patterns and textures requiring specialized care:
– Use products specifically formulated for exotic leathers
– Work conditioners carefully around scales and texture patterns
– Clean with extra gentle techniques to preserve natural patterns
– Consider professional care for valuable or antique exotic leather items
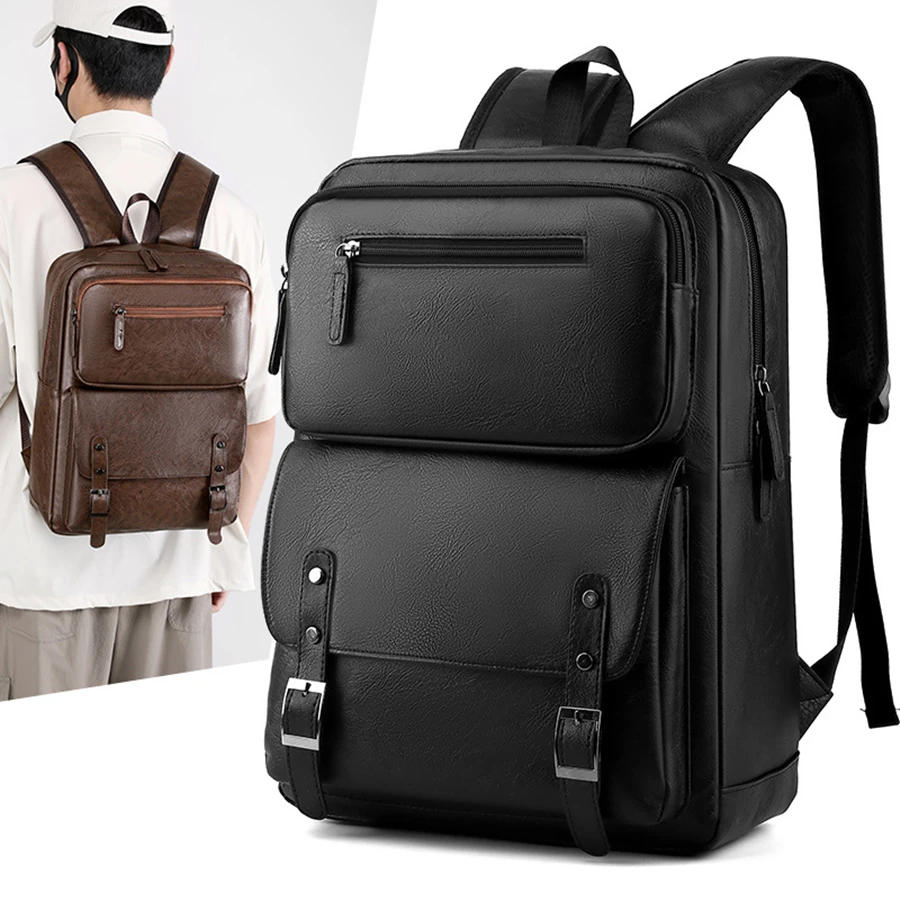
The variety of men’s leather backpacks available showcases these different leather types, each with their specific care requirements and aesthetic qualities.
Caring for Suede and Nubuck: Special Considerations
Suede and nubuck present unique challenges because their brushed surface can be easily damaged by traditional leather care products:
Specialized Brushing
– Use a dedicated suede brush with rubber or crepe components to lift dirt
– Brush in one direction initially, then brush counter to restore the nap
– Use gentle pressure—aggressive brushing can wear down the surfaceStain Management
– Address stains immediately with a suede eraser (never water for oil-based stains)
– For water stains, allow to fully dry then gently brush to restore nap
– Use specialized suede cleaners for stubborn marksNap Restoration
– Steam from a kettle held 6-8 inches away can help restore flattened nap
– Follow steaming immediately with brushing while still damp
– A clean toothbrush works well for small areas or detailed sectionsWaterproofing
– Only use spray protectors specifically formulated for suede/nubuck
– Apply in very light coats to prevent matting down the surface
– Reapply more frequently than with finished leathers (every 3-4 weeks with regular use)
Common mistakes include using any liquid conditioners or oils, which permanently mat the surface and destroy the distinctive texture that makes suede appealing.
Maintaining Patent and Finished Leathers
Patent leather’s distinctive high-gloss surface results from a plastic coating applied over the leather base. This creates unique care requirements:
Appropriate Cleaning
– Use a soft cloth dampened with water or specialized patent cleaner
– Wipe gently, never scrub, to avoid scratching the glossy surface
– For stubborn dirt, use a small amount of mild soap on a damp cloth
– Dry and buff immediately to prevent water spottingShine Maintenance
– Use patent-specific polishes to restore gloss (never use regular leather polish)
– Apply with a soft cloth in circular motions, then buff to shine
– Window cleaner (ammonia-free) can restore shine in a pinch
– Patent leather restorer can address dullness from ageSpecial Considerations
– Avoid all conventional leather conditioners and oils
– Prevent patent surfaces from touching to avoid sticking
– Store with tissue paper between folds to prevent cracking
– Keep away from heat sources, which can cause the coating to bubbleScratch Management
– Minor scratches can often be buffed out with a soft cloth
– Vaseline applied sparingly can temporarily fill small scratches
– Deep scratches may require professional repair
Unlike regular leather, patent leather doesn’t breathe, so it’s more susceptible to temperature extremes. Always allow patent leather items to gradually adjust to room temperature after exposure to cold.
Troubleshooting Common Leather Issues
Even with regular care, leather items sometimes develop problems that require specific remediation techniques. Addressing these issues promptly can prevent minor damage from becoming permanent.
Dryness and Cracking
Symptoms: Stiff feel, visible surface cracks, chalky appearance
Treatment:
1. Clean gently with leather-specific cleaner
2. Apply a rich, penetrating conditioner in multiple light layers
3. Allow extended absorption time between applications
4. For severe cases, use a leather repair cream formulated to fill minor cracks
5. Implement more frequent conditioning to prevent recurrence
Water Damage
Symptoms: Stiff areas, water spots, ring marks, mildew smell
Treatment:
1. Allow to dry completely at room temperature (never use heat)
2. For water spots, dampen the entire section evenly then allow to dry
3. Once dry, apply conditioner to restore moisture balance
4. For severe cases, consult a professional leather restoration service
Oil and Grease Stains
Symptoms: Dark spots, typically with a slightly slick feel
Treatment:
1. Blot excess oil immediately without rubbing (which spreads the stain)
2. Apply absorbent powder (cornstarch, baking soda, or talcum powder)
3. Leave powder on for 12-24 hours to draw out oil
4. Brush away powder and repeat if necessary
5. For persistent stains, apply leather-specific degreaser
Mold and Mildew
Symptoms: White or green fuzzy growth, musty odor
Treatment:
1. Move item to a dry, well-ventilated area
2. Gently wipe with cloth dampened with rubbing alcohol solution (1:1 with water)
3. Allow to dry completely away from heat and sunlight
4. Apply leather conditioner to restore moisture balance
5. Store with moisture-absorbing products to prevent recurrence
Color Fading
Symptoms: Lightened areas, uneven color, sun bleaching
Treatment:
1. Clean thoroughly to remove surface dirt
2. Apply color-matched leather dye for small areas
3. For larger sections, consider professional re-dyeing
4. Apply conditioner and protectant after color restoration
5. Minimize future sun exposure to prevent recurrence
Practical solutions for common leather issues can help restore many leather backpacks to good condition, though severe damage may require professional attention.
Repairing Scratches and Scuffs on Leather
Scratches and scuffs are inevitable with regular use but can often be minimized or repaired:
For Light Surface Scratches:
1. Clean the area with a slightly damp cloth
2. Apply leather conditioner directly to the scratch
3. Gently massage in circular motions until the scratch becomes less visible
4. Allow to absorb fully, then buff with a soft cloth
5. The oils in the conditioner often plump the leather fibers enough to minimize minor scratches
For Deeper Scratches:
1. Clean and dry the damaged area
2. Apply a small amount of leather filler in a matching color
3. Use a plastic spreader to work the filler into the scratch
4. Allow to dry completely according to product instructions
5. Apply conditioner to blend the repaired area with surrounding leather
For Scuffs and Abrasions:
1. Gently clean the scuffed area
2. For white scuffs on dark leather, a pencil eraser can often remove the mark
3. Apply matching leather cream or polish
4. Buff gently until the scuffed area blends with surrounding leather
5. Finish with conditioner to restore moisture
For valuable items with significant damage, professional repair is often worth the investment rather than risking DIY methods that might cause further damage.
Addressing Water Damage and Stains
Water damage requires prompt attention to prevent lasting marks or structural issues:
For Fresh Water Exposure:
1. Blot immediately with an absorbent cloth—never rub, which pushes water deeper into the leather
2. Allow to air dry naturally away from direct heat sources
3. Once completely dry, apply conditioner to restore oils displaced by water
4. If slight stiffness remains, gently flex the leather as it continues to dry
For Water Spots and Rings:
1. For small spots, slightly dampen the entire panel/section of leather
2. Allow to dry evenly to eliminate the water line
3. Once dry, condition the entire section
4. For persistent spots, consider a specialized leather spot remover
For Salt Stains from Winter Exposure:
1. Mix equal parts white vinegar and water
2. Dampen a cloth with the solution and gently wipe the salt-stained area
3. Follow immediately with a clean, damp cloth to remove vinegar residue
4. Allow to dry completely, then condition
For Leather That Has Stiffened After Wetting:
1. Apply leather conditioner generously
2. Work into the leather with gentle circular motions
3. Allow to absorb for several hours or overnight
4. Gently flex and manipulate the leather to restore flexibility
5. Repeat conditioning if necessary
Severe water damage that has caused significant hardening or molding may require professional restoration. Prevention through regular waterproofing is far easier than treating water damage after it occurs.
Seasonal Leather Care Strategies
Leather requires different care approaches throughout the year to address changing environmental challenges. Adapting your maintenance routine seasonally helps protect your leather goods from specific seasonal threats.
Summer Care
Heat, humidity, and UV exposure create unique summer challenges:
– Apply UV-protecting leather conditioner before the season begins
– Increase cleaning frequency to address sweat and body oils
– Use lighter conditioners that won’t feel heavy in high temperatures
– Keep leather items out of direct sunlight when not in use
– Allow leather to breathe rather than storing in plastic containers
– Treat salt stains from beach exposure immediately
Winter Preparation
Cold, dry air and exposure to snow and salt require proactive protection:
– Apply a heavy-duty waterproofing treatment before winter
– Focus extra protection on seams and stress points
– Create barriers against salt damage with additional wax at lower edges
– Keep a leather emergency kit for immediate salt stain treatment
– Maintain indoor humidity to prevent excessive drying
– Allow wet leather to dry completely before storage or reuse
Humid Climate Considerations
High humidity environments risk mold and mildew development:
– Increase cleaning frequency to remove surface moisture
– Use conditioners with antimicrobial properties
– Store with silica gel packets to absorb excess moisture
– Allow regular air circulation around stored leather items
– Consider dehumidifiers in storage areas
– Inspect regularly for early signs of mold
Dry Climate Adjustments
Low humidity can cause accelerated drying and cracking:
– Condition more frequently with richer, more penetrating products
– Store away from heating vents which further reduce moisture
– Consider using humidifiers in storage areas
– Apply conditioner before long storage periods
– Check leather flexibility regularly for signs of drying
Leather travel backpacks face particularly varied conditions as they move between different environments, making seasonal adaptations especially important for these items.
Maintaining Leather Products: Daily and Long-Term Care
Establishing regular maintenance routines at different intervals helps prevent major issues and extends your leather goods’ lifespan significantly.
Daily Care (5 minutes)
- Wipe down with a dry, soft cloth after use to remove surface dust
- Store properly—hanging garments, stuffed bags, shoe trees in footwear
- Avoid prolonged direct sunlight or heat exposure
- Remove any fresh spills or stains immediately
- Allow wet leather to dry naturally before storage
Weekly Maintenance (10-15 minutes)
- Inspect for new stains, scuffs, or problem areas
- Brush with a soft brush to remove accumulated dust
- Check hardware (zippers, buckles) for issues
- Rotate usage of similar items to prevent uneven wear
- Apply light conditioner to high-wear areas if needed
Monthly Deep Care (30-60 minutes)
- Thorough cleaning with appropriate leather cleaner
- Complete conditioning treatment
- Address any developing issues before they worsen
- Check for loose stitching or repairs needed
- Apply edge coating to exposed leather edges if worn
Seasonal Protection (60-90 minutes)
- Deep cleaning of all surfaces including seams and crevices
- Rich conditioning appropriate to the coming season
- Complete waterproofing treatment
- Hardware maintenance (oiling zippers, polishing metal)
- Assessment of overall condition and professional repair if needed
Annual Evaluation
- Complete inspection for structural issues
- Professional cleaning if heavily soiled
- Restoration of color if faded
- Major repair assessment
- Storage preparation for seasonal items
Proper storage between uses is equally important—keep leather items in breathable cotton dust bags rather than plastic, use shoe trees for footwear, stuff handbags to maintain shape, and hang garments on padded hangers to prevent creasing.

14 Inch Leather Laptop Backpack, Brown Leather Backpack, Men's Leather Backpack, Vintage Leather Backpack
Price range: $177.28 through $199.12 Select options This product has multiple variants. The options may be chosen on the product page
Carry On Leather Backpack, Roll Top Leather Backpack
Price range: $77.76 through $96.48 Select options This product has multiple variants. The options may be chosen on the product page
Designer Mini Backpack, Mini Leather Backpack, Small Leather Sling Backpack, Women's Leather Backpack
Price range: $95.76 through $98.80 Select options This product has multiple variants. The options may be chosen on the product page
Designer Mini Backpack, Designer Women's Backpack, Mini Leather Backpack, Women's Leather Backpack
Price range: $135.92 through $137.64 Select options This product has multiple variants. The options may be chosen on the product page
17 Inch Leather Laptop Backpack, Men's Leather Travel Backpack, Men's Leather Work Backpack
Price range: $106.28 through $143.88 Select options This product has multiple variants. The options may be chosen on the product page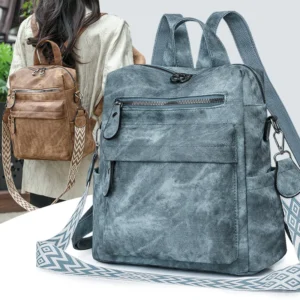
Black Leather Backpack, Small Leather Backpack, Women's Leather Backpack
Price range: $112.96 through $116.12 Select options This product has multiple variants. The options may be chosen on the product page
Advanced Waterproofing for Extreme Conditions
Some leather items require exceptional protection due to heavy use or exposure to challenging environments. Advanced waterproofing techniques offer superior protection beyond standard methods.
For Outdoor Adventure Equipment
Leather gear used for hiking, camping, or outdoor sports needs maximum protection:
– Apply multiple layers of heavy-duty wax-based waterproofer
– Focus extra protection on stress points and seams
– Consider specialized outdoor-specific leather protectants
– Reapply protection before each significant outing
– Implement immediate after-use care routine
For Heavy Rain Exposure
Leather items regularly exposed to significant rainfall require:
– Silicone-based waterproofing sprays for initial protection
– Wax overlay on particularly vulnerable areas
– Special attention to stitching lines where water penetrates
– Consideration of specialized rubber or silicon edge coatings
– More frequent reapplication schedule than standard leather goods
For Snow and Winter Conditions
Leather exposed to snow, ice, and salt needs specialized preparation:
– Heavy wax-based protectant built up in multiple thin layers
– Additional protection barrier at edges most likely to contact snow
– Specialized salt-repellent products on lower portions
– Weekly reapplication during peak winter months
– Immediate cleaning after salt exposure
For Marine Environments
Leather used near bodies of water faces unique challenges:
– Mildew-resistant formulations in addition to standard waterproofing
– UV protectants to prevent sun damage enhanced by water reflection
– Specialized marine leather protectants that resist salt water
– More frequent conditioning to counter effects of salt and humidity
– Complete reapplication after any salt water exposure
Leather rucksacks designed for outdoor adventures particularly benefit from these advanced protection techniques when facing varied weather conditions.
Essential Leather Care FAQs
Will conditioning darken my leather?
Most conditioners will temporarily darken leather during application, but quality products return to a color close to the original after drying. Oil-based conditioners typically cause more permanent darkening than cream-based products. Always test on an inconspicuous area first, especially with lighter leathers. Some darkening is often desirable as it enhances the leather’s natural richness and depth.
How often should I condition different leather items?
Conditioning frequency depends on usage and environment:
– Daily-use items (wallets, everyday bags): Every 1-3 months
– Occasional-use items (dress shoes, special occasion bags): Every 3-6 months
– Stored or seasonal items: Twice yearly before and after storage
– Items in harsh conditions (work boots, outdoor gear): Monthly or after significant exposure
The best indicator is the leather itself—when it starts looking dry or feeling less supple, it’s time to condition.
Can household oils substitute for leather conditioners?
While some household oils (olive, coconut) can temporarily soften leather, they lack the balanced formulation of proper leather conditioners. These oils can go rancid over time, attract dirt, or create uneven absorption. For occasional emergency treatment, neatsfoot oil or pure lanolin provide better results than kitchen oils, but specialized leather conditioners remain the best option for long-term care.
Is it possible to over-condition leather?
Yes. Over-conditioning saturates the fibers, creating a sticky surface that attracts dirt and can lead to stretching or structural weakness. Signs include a tacky feel, darkening that doesn’t fade after drying, or a greasy appearance. If this occurs, gently wipe the surface with a leather cleaner, allow to dry completely, and use less product in the future.
Can all leather be waterproofed?
Most leather can be made water-resistant, but true waterproofing isn’t possible without compromising leather’s natural properties. Finished leathers accept waterproofing well, while suede and nubuck require specialized products. Exotic leathers often have unique requirements—some respond poorly to standard waterproofing methods. Patent leather already has a waterproof coating and doesn’t require additional protection.
How do I test if my leather needs conditioning?
The bend test provides a reliable indicator: Gently bend or flex the leather—if tiny white lines appear (called “leather bloom”), conditioning is needed. Another test is the water drop test: Place a single drop of water on the surface—if it absorbs quickly rather than beading up, the leather needs conditioning. Finally, visual and tactile assessment (dull appearance, stiff feel) often indicates conditioning is required.
What’s the best way to store leather items long-term?
For extended storage:
1. Clean and condition thoroughly before storing
2. Use breathable cotton dust bags, never plastic
3. Maintain shape with appropriate stuffing (acid-free tissue for bags, shoe trees for footwear)
4. Store in moderate temperature and humidity (avoid attics, basements, garages)
5. Keep away from direct sunlight to prevent fading
6. Check periodically and recondition if needed
7. Store leather items away from wood surfaces that might transfer oils
Can I use the same products on all my leather goods?
While using a single product seems convenient, different leather types have specific needs. Full-grain, top-grain, suede, patent, and exotic leathers each require specialized products. Using the wrong product can damage the leather’s specific properties. However, within similar leather types, you can often use the same products—for example, the same conditioner might work well for various full-grain leather items like bags, wallets, and belts.
Is Natural Better? Understanding Conditioning Ingredients
The natural versus synthetic conditioning debate centers on effectiveness, leather compatibility, and environmental considerations:
Natural Oils:
– Neatsfoot Oil: Derived from cattle bones, penetrates deeply but can darken leather significantly
– Mink Oil: Provides excellent waterproofing but causes substantial darkening and can oversoften leather with repeated use
– Lanolin: From sheep wool, offers gentle conditioning with moderate darkening
Plant-Based Options:
– Jojoba Oil: Chemically similar to leather’s natural oils, absorbs well with minimal darkening
– Coconut Oil: Provides short-term softening but can go rancid over time
– Beeswax: Excellent for waterproofing but requires mixing with oils for proper absorption
Synthetic Conditioners:
– Silicone-Based: Creates effective barriers with minimal darkening but may build up over time
– Petroleum Derivatives: Penetrate deeply but can cause over-softening with heavy use
– Polymer Blends: Offer consistent results and specific properties but may contain questionable chemicals
The best modern conditioners often combine natural and synthetic ingredients—natural oils provide nourishment while synthetics ensure consistent performance and extended shelf life. For those with environmental or ethical concerns, plant-based formulations have improved significantly in recent years, offering effective conditioning without animal products.
How Can I Tell When My Leather Needs Conditioning?
Recognizing when leather requires conditioning prevents both under-maintenance and over-conditioning. Look for these key indicators:
Visual Indicators:
– Dull, lifeless appearance lacking natural luster
– Light or faded spots, particularly in areas of frequent bending
– Visible fine lines when the leather is gently flexed
– Uneven coloration or patchy appearance
– Flaking or powdery surface in extreme cases
Texture Tests:
– Leather feels stiff rather than supple when flexed
– Surface feels rough or paper-like rather than smooth
– Loss of natural give or stretch
– Hard or brittle edges, particularly on bags or wallets
Water Absorption Test:
Place a small drop of water on an inconspicuous area—if it rapidly absorbs into the leather rather than beading up on the surface, conditioning is needed.
Bend Test:
Gently fold the leather—if small white lines appear at the bend (similar to when you bend a crayon), the leather is too dry.
Seasonal evaluation is also important—leather typically needs additional conditioning after winter (due to heating systems) and summer (due to UV exposure). Black leather backpacks often show dryness more visibly as light-colored marks against their dark background, making condition assessment easier.
Regular assessment prevents the irreversible damage that can occur when leather becomes severely dried out. When in doubt, conditioning more frequently with lighter applications is better than waiting until leather shows significant signs of dryness.